.png)
HTML Tags
- HTML Tags mainly have two parts opening tag and a closing tag.
- HTML starting tag inclosed within <> and closing tags is inclosed within
- Some HTML tags are self-closing tags or these tags are called empty tags.
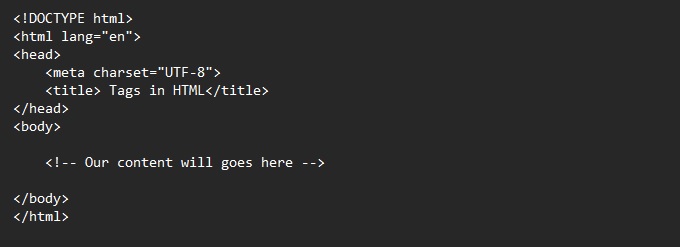
Create Html file and follow the steps given below
write our source code inside the body tag and will see the result in the browser.
Click here for creating html file steps
Now copy the file path of index.html and paste in web browser.
Index.html
Try our learning method, copy-paste or type the codes given below and refresh your web browser.
About all Tags
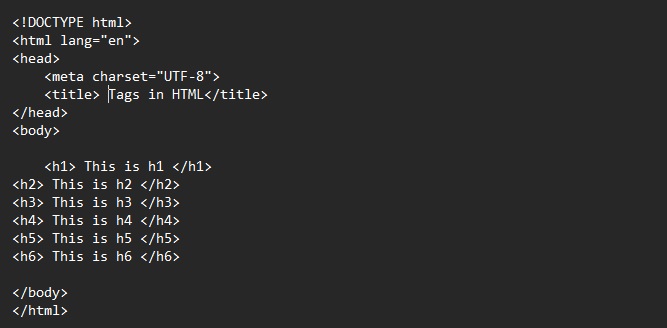
1. Heading Tag :
- Heading tag is used to create the heading on web pages.
- There are 6 headings available in HTML from h1 to h6.
- h1 is the largest heading
- h6 is the smallest heading.
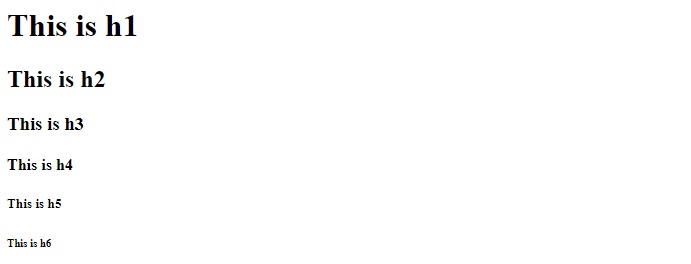
Output :
2. < a >
The tag defines a hyperlink, which is used to link from one page to another.
The most important attribute
of the element is the href attribute, which indicates the link's destination.
- An unvisited link is underlined and blue
- A visited link is underlined and purple
- An active link is underlined and red
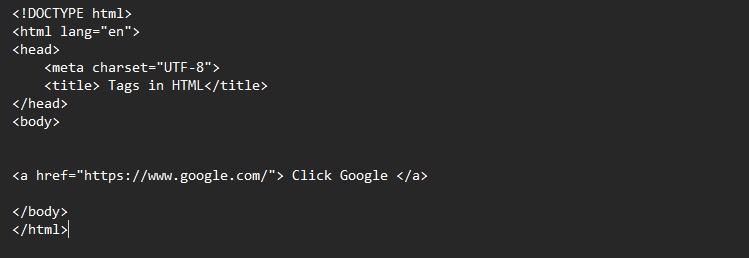
Output :

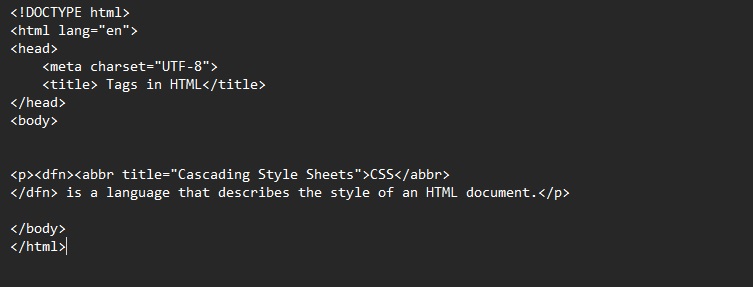
3. Abbreviation
The < abbr > tag defines an abbreviation
< abbr > can also be used with < dfn > to define an abbreviation
Output :

4. Bold Tag :
The < b > tag specifies bold text without any extra importance.
Syntax :

5. Break Tag
Insert single line breaks in a text
Syntax :

6. Delete Tag :
A text with a deleted part, and a new, inserted part
Syntax :

Output

Advertisement

7. Center Tag
The < center > tag was used in HTML4 to center-align text.
Syntax :

8. Font Tag
The < font > tag was used in HTML 4 to specify the font face, font size, and color of text.
9. Footer Tag
A footer section in a document
10. Form Tag
The < form > tag is used to create an HTML form for user input.
The < form > element can contain
one or more of the following form elements:
- < input >
- < textarea >
- < button >
- < select >
- < option >
- < optgroup >
- < fieldset >
- < label >
- < output >
< input >
The < input > tag specifies an input field where the user can enter data.
The < input > element is the most important form element.
The < input > element can be displayed in several ways, depending on the type attribute.
The different input types are as follows:
- < input type="button" >
- < input type="checkbox">
- < input type="color">
- < input type="date">
- < input type="datetime-local">
- < input type="email">
- < input type="file">
- < input type="hidden">
- < input type="image">
- < input type="month">
- < input type="number">
- < input type="password">
- < input type="radio">
- < input type="range">
- < input type="reset">
- < input type="search">
- < input type="submit">
- < input type="tel">
- < input type="text">
- < input type="time">
- < input type="url">
- < input type="week">
Always use the < label> tag to define labels for < input type="text">, < input type="checkbox">,
< input type="radio">, < input type="file">, and < input type="password">
For < input> examples Visit Here
Introduction to HTML Part-1 PDF Click here to download
Easy Pickup
- Html Samples
- Html Malayalam Classes
- Html Malayalam Notes